
Introduction
Lock JUP AG allows users and projects to lock and distribute their tokens over time. This means they can set a time, date, and interval for the token release.
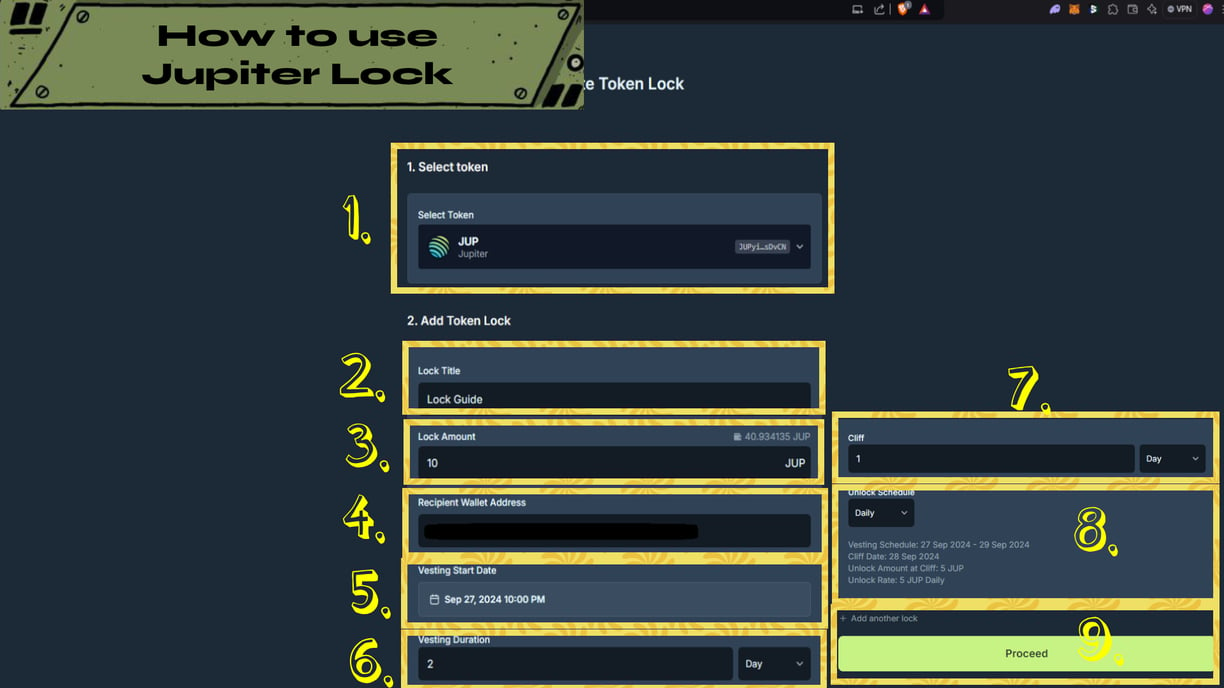
I want to lock 10 JUP for 2 days (vesting) but I want it to start releasing the token after 1 day (cliff).
After 1 day, I want it to start releasing the tokens daily (unlock schedule). Means each day it will start distributing 5 JUP to my wallet for 2 days after the 1 day cliff.
Guide and explanation below.
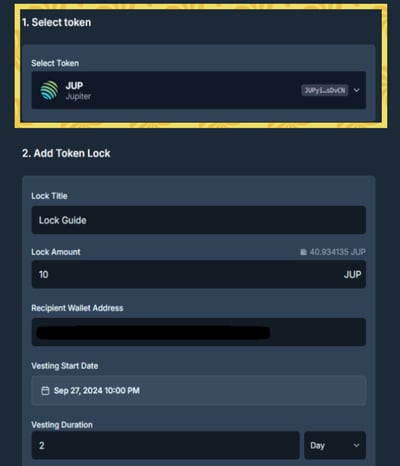
Select Token Tab
In this tab it's asking you which token do you want to start locking and distributing.
1. Click the drop down menu
2. Search or Select the token you want to lock
Note:
1. Make sure you're selecting the right token.
2. If you're having a hard time looking for the token you can just paste the token Contract Address instead.

Lock Title
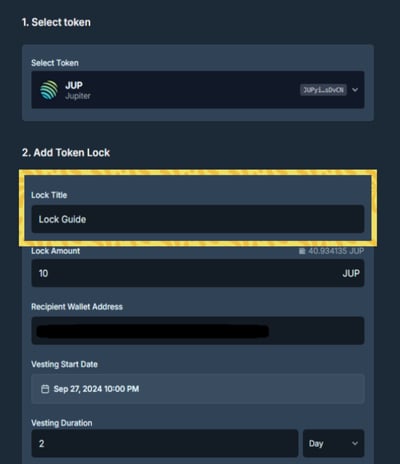
In this tab it's asking you to input a title subject for this lock. Using the reason for this lock might be a good idea.
1. Click the Text Box
2. Type the Title or Subject for this lock

Note:
1. If you're making a multiple lock tokens, using specific title would be a nice idea to avoid confusion what's the lock for.
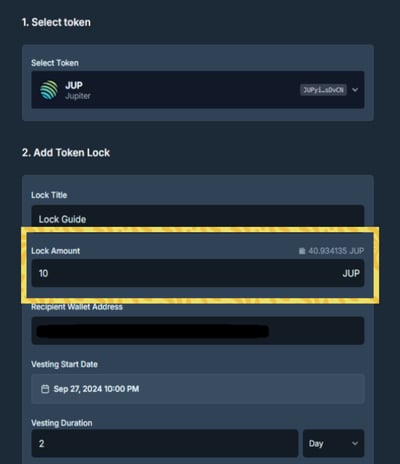
Lock Amount Tab
In this tab it's asking you the amount of tokens that you would like to lock and distribute over time.
1. Click the Text Box
2. Input the amount
Note:
1. Make sure to triple check the amount you inputted
2. If you're adding point (.) make sure to check distance between the numbers especially if you have multiple Zeros.

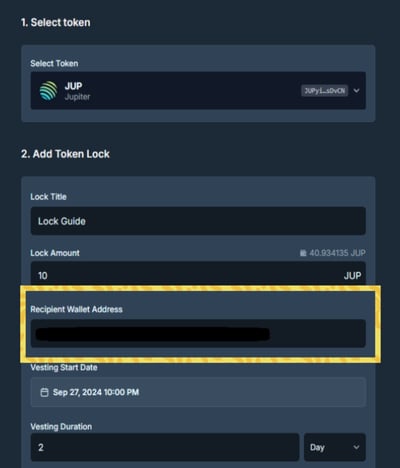
Recipient Wallet Address Tab
In this tab it's asking you which wallet address the tokens will be sent to once it started distributing the token. In short, the receiving wallet address for the tokens
1. Click the Text Box
2. Paste the Wallet Address

Note:
1. Make sure to triple check the wallet address you inputted
2. Since there's no automatic wallet address pasting you can triple check the first and last 4 characters of the wallet you inputted and compare it to the wallet you copied.
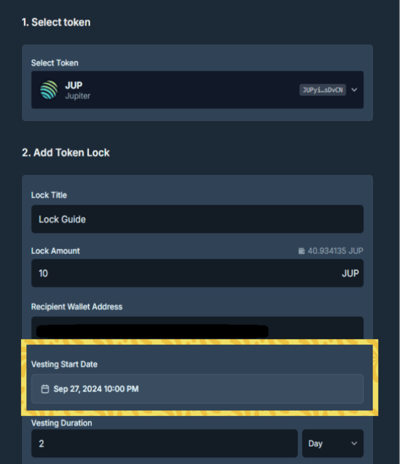
Vesting Start Tab
In this tab it's asking you when do you want to start the vesting or locking schedule before it start the cliff schedule.
1. Click the Calendar Tab
2. Click the Month and Date
3. Click the Time and change it to your liking

Note:
1. Make sure to triple check the dae you've chosen especially if you're doing a community locking schedule.
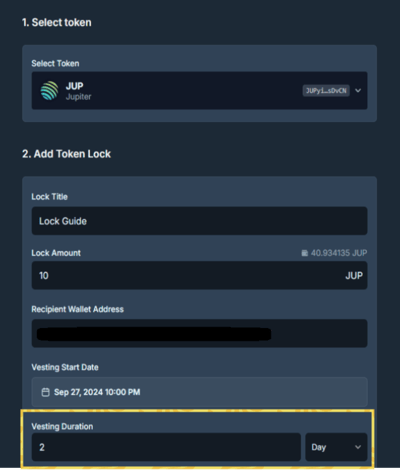
Vesting Durating Tab
In this tab it's asking you how long do you want the token to be lock or vested. It means it's a total amount of time it will be lock.
1. Click the drop down menu
2. Choose if it's minute, daily, week, and etc.
3. Click the Text Box
4. Input the value of how many minutes, days, weeks, and etc it will last
Note:
1. Make sure to triple check the vesting duration, messing this up means your token might get lock shorter or longer than what you plan.

Cliff Tab
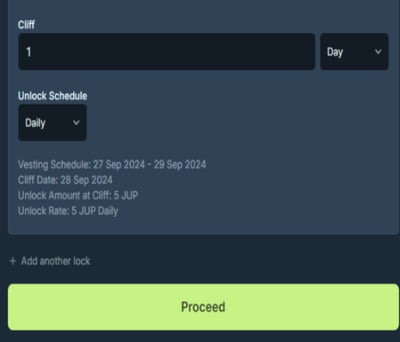
In this tab it's asking you how long do you want before it start the Vesting Duration and start releasing the token partially. This also determine how much token the schedule can unlock each time.
1. Click the drop down menu
2. Choose if it will be by minute, daily, weeks, or etc
3. Click the Text Box
4. Input the value how many minute, day, week, or etc it will occur or last.

Note:
1. Make sure to triple check the Cliff duration because your Vesting Schedule will never start not until it reaches or fulfilled the Cliff duration.
2. Cliff value shouldn't be higher than the Vesting Duration. But no worries the website will show the error so you can follow the rule.
Unlock Schedule Tab
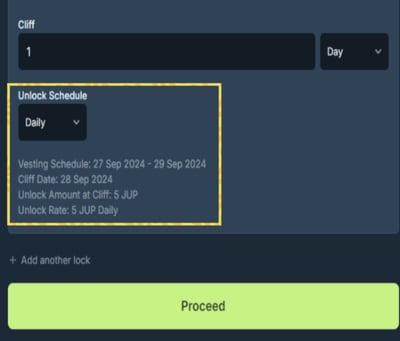
In this tab it's asking you how frequent do you want to release the token after meeting or fulfilling the Cliff Duration. It will also determine how much token you will get daily by dividing the Vesting Duration to your Unlock Schedule.
1. Click the drop down menue
2. Select which schedule is suitable for your unlocks.
Note:
1. Make sure to triple check your Unlock Schedule especially if you're following some kind of release plan.
2. Review the details of the Unlock Schedule below to understand more how much token it will release based on the selected schedule.

Proceed and Create Contract
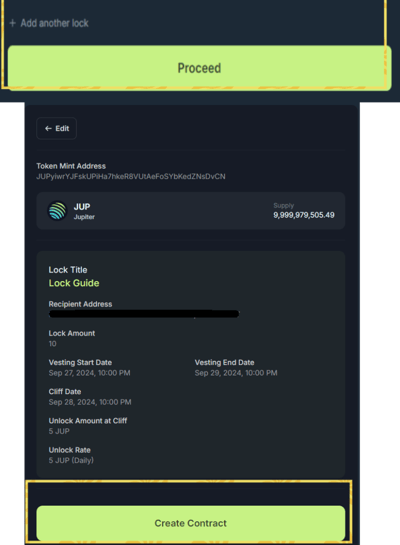
After setting up everything you can click the proceed button now to next process which is Creating Contact to finalize your transaction. After that just follow the rest of the instructions on Lock JUP AG website.
1. Click Proceed Button
2. Check the Details
3. Click the Create Contract Address
4. Follow the rest of the instructions of finalizing it.

Note:
1. You can add additional lock by clicking the "+ Add another lock" before proceeding if you need more than one.
2. After Clicking the Create Contract and typing "Lock" there's no going back so please make sure to triple check the details before proceeding.
