
Introduction
USDC is a bridging feature in jup.ag which allows you to bridge a secure native token USDC transfer between different networks or chains with zero fees and slippage. It's powered by Wormhole and Circle.
Example:
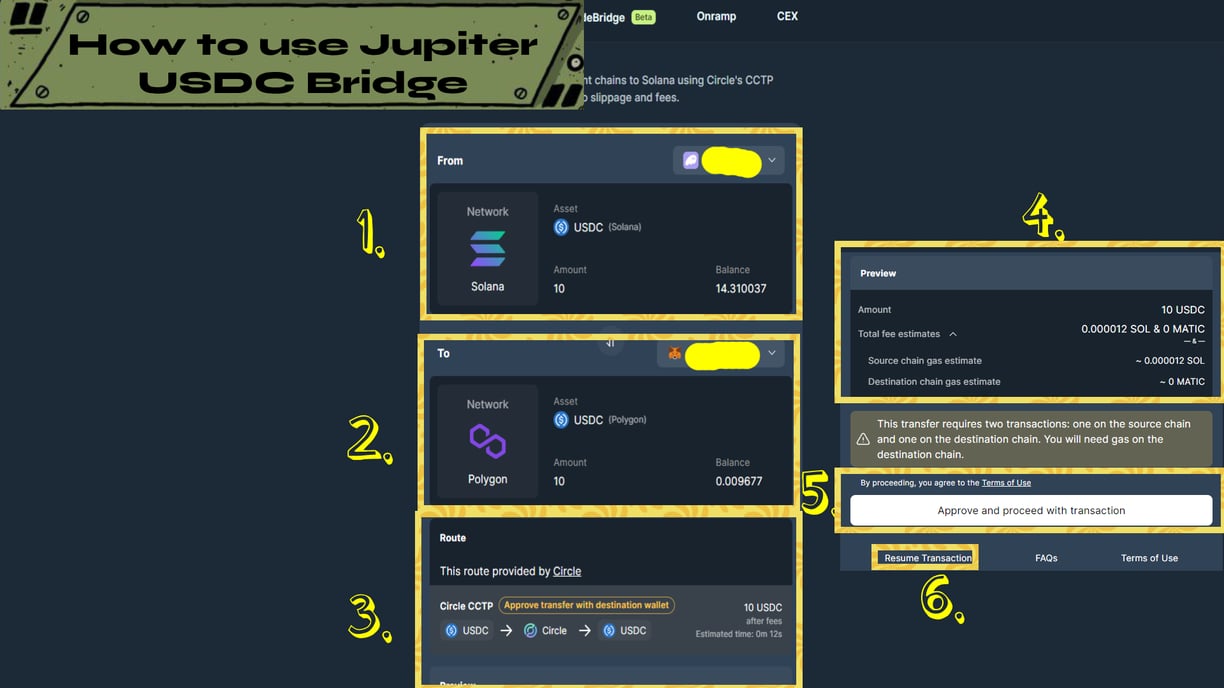
I want to bridge a 10 USDC from Solana Network to Polygon Network using the USDC tab.
Check the guide below.
Note:
Originally, the main tab mentioned it's to send USDC from diff. chains to solana but I don't have funds in there atm <3
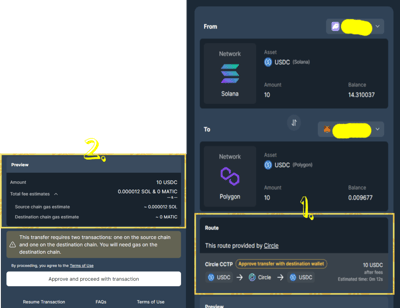
From Network: Token: Wallet Tab
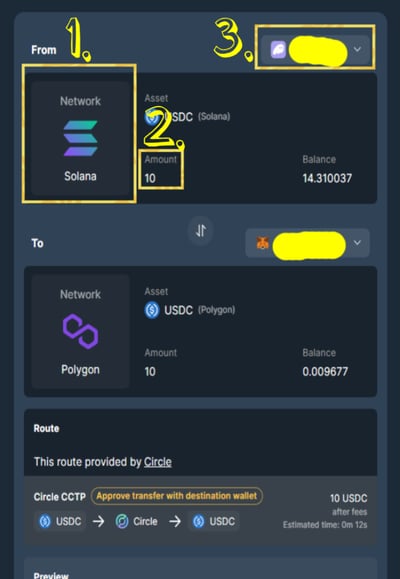
In this tab it's asking you which network you're sending the token. And what token are you going to send and how much is it. And the wallet you're going to use for it.
1. Choose the Network which the token coming from
2. Insert the amount of that token you want to bridge or send
3. Connect the supported wallet.
Note:
1. Make sure to double check network it's coming from
2. Check the token you want to bridge or send
3. And triple check the amount you want to bridge or send
4. Check if you're using the right or suitable wallet

To Network: Token: Wallet Tab
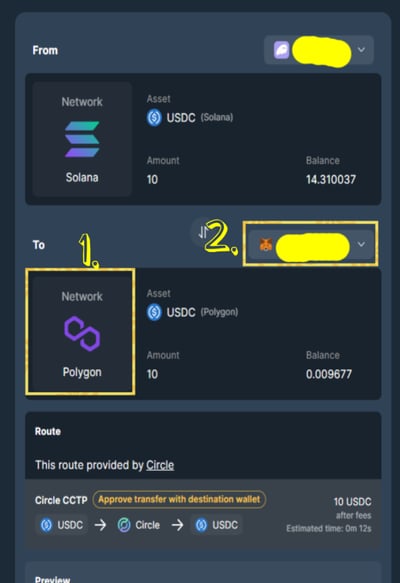
In this tab it's asking you which network you want to receive the token you're bridging.
1. Choose the network you want to receive it to
2. Connect the wallet you want to receive your USDC to

Note:
1. Make sure to double check if you're using the right network.
2. Double check the token if you're also using the right wallet.
Route and Preview Tab
In these tabs it shows the preview of the tokens you will receive including the possible time of arrival, fees, and the of process Circle CCTP bridging your USDC.
1. Shows how Circle CCTP going to bridge it, how much you will get, and the estimated time for it to happen.
2. Preview of the details and required fees for each network.
Note:
1. The said fees in the preview is the fees from those native or specific wallet to pay in order to confirm and receive your USDC.

Approve and Proceed Tab
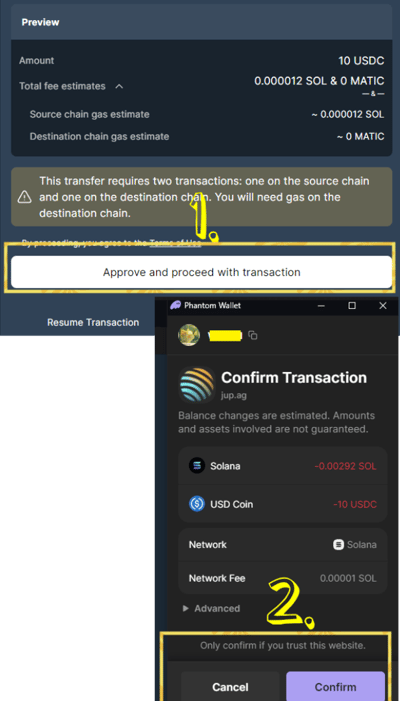
After setting up the From and To tabs it's time to approve and proceed the transaction. The button should be available by now.
1. Click the Approve and Proceed with transaction button
2. Confirm the details and click the Confirm Button

Note:
1. Make sure to double check the details reflected in your wallet popup window to avoid some possible problem.
2. If the popup window mention "Simulation Error" or other "Red" tag message just cancel the transaction and click the approve button again.
Resume Transaction
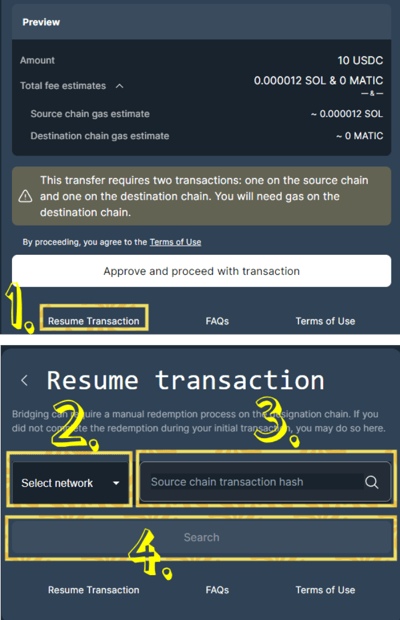
After approving the transaction in order to receive the USDC we sent from Solana to Polygon we need to Resume Transaction and manually claim it.
1. Click the Resume Transaction Button
2. Select Network for the receiving address (Polygon)
3. Paste the Transaction Hash
4. Click Search
Note:
1. Transaction Hash can be found on the network explorer like Solscan, Etherscan, Polygonscan, and etc. after pasting your wallet and your wallet history.
2. After clicking the Search a new "Claim" related button will appear. Just follow the process after that to finalize your transaction.
